Overview
The RadBeacon E4 is the next generation Radius Networks Bluetooth™ Smart proximity multi-beacon device. The RadBeacon E4 supports the 4 most popular beacon protocols; iBeacon, AltBeacon, Eddystone UID, and Eddystone URL. The RadBeacon E4 can be configured to advertise data in up to 5 individual slots. The RadBeacon E4 is powered from 4 user-replaceable AA batteries.
User Configuration
The RadBeacon E4 allows for user configuration via the RadBeacon E App available for iOS and Android devices.
Switching the Beacon Off
The E4 can be switched off by disabling all the 5-slots on the beacon using the RadBeacon E app. Refer to the slot configuration section below for details on how to enable/disable a slot.
The button on the side of the beacon is used for enabling configuration-mode. Configuration-mode is entered after pressing and releasing the button while not in configuration-mode. The blue LED will blink twice to confirm beacon has entered configuration-mode. The beacon will remain in configuration-mode for the next 10 minutes. Only while in configuration-mode the beacon will broadcast connectable advertisements.
iOS app user guide
The RadBeacon E App allows users to configure their RadBeacon E4 device parameters.
Scanning
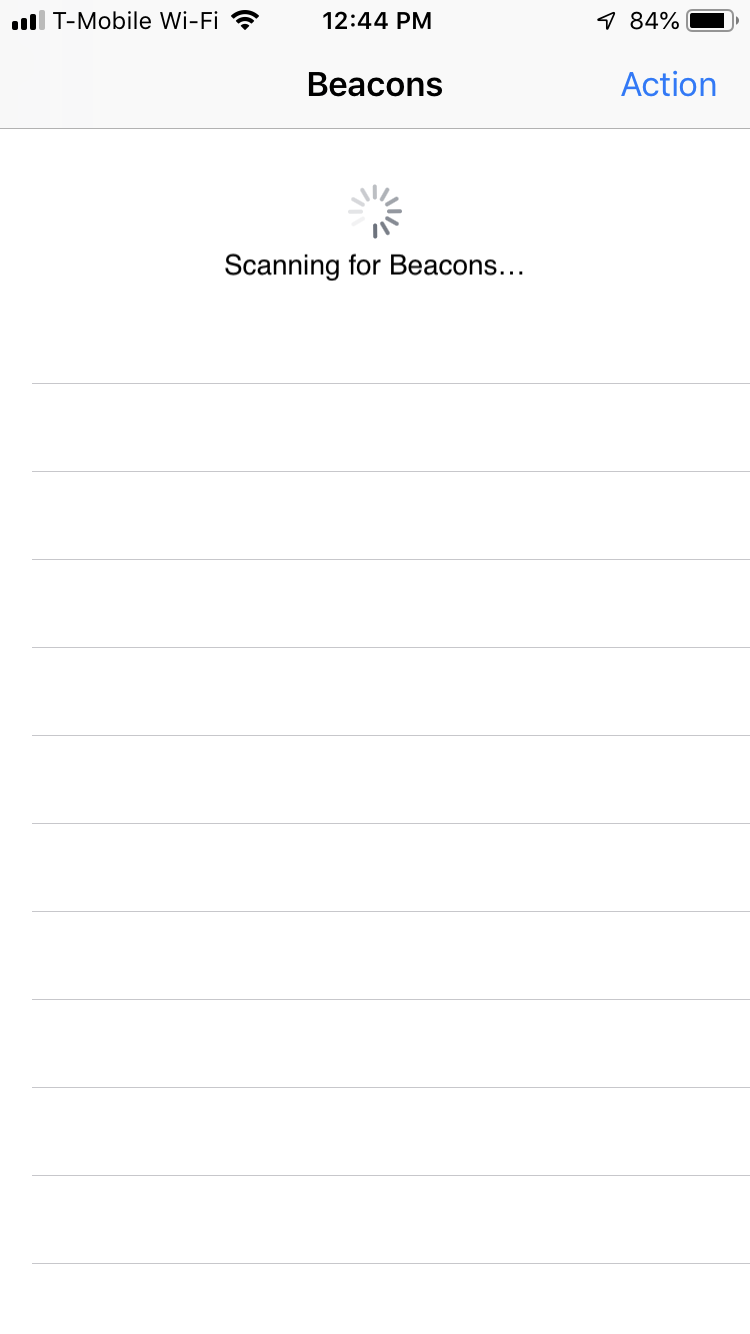
The device scanning process is initiated by pulling down on the home screen of the RadBeacon E App. Next, you should see a progress icon with a message indicating that scanning has started, as shown below.
Beacon Found
After a few seconds of scanning, the home screen should list the available in-range devices. Note: If the Beacon list remains empty after 15 seconds of scanning, we can assume there are no RadBeacon E devices in range.

Beacon Detail
The Beacon Detail screen contains fields for configuring the beacon parameters, and fields that display beacon status information.
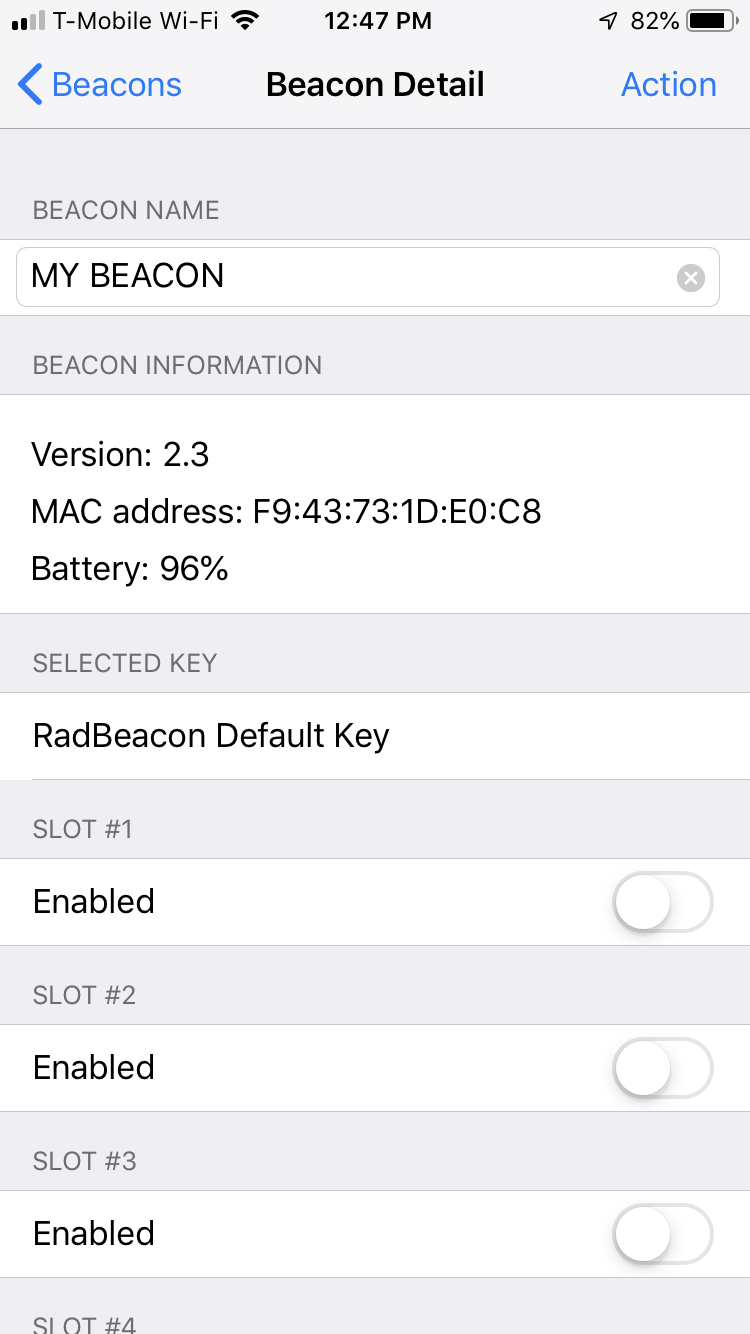
Beacon Name
To edit the beacon name, start by tapping on the beacon name edit box under the “Beacon Name” label.The beacon name can be set to a maximum length of 32 characters. If a name containing more than 32 characters is applied as part of the changes, it will be ignored.
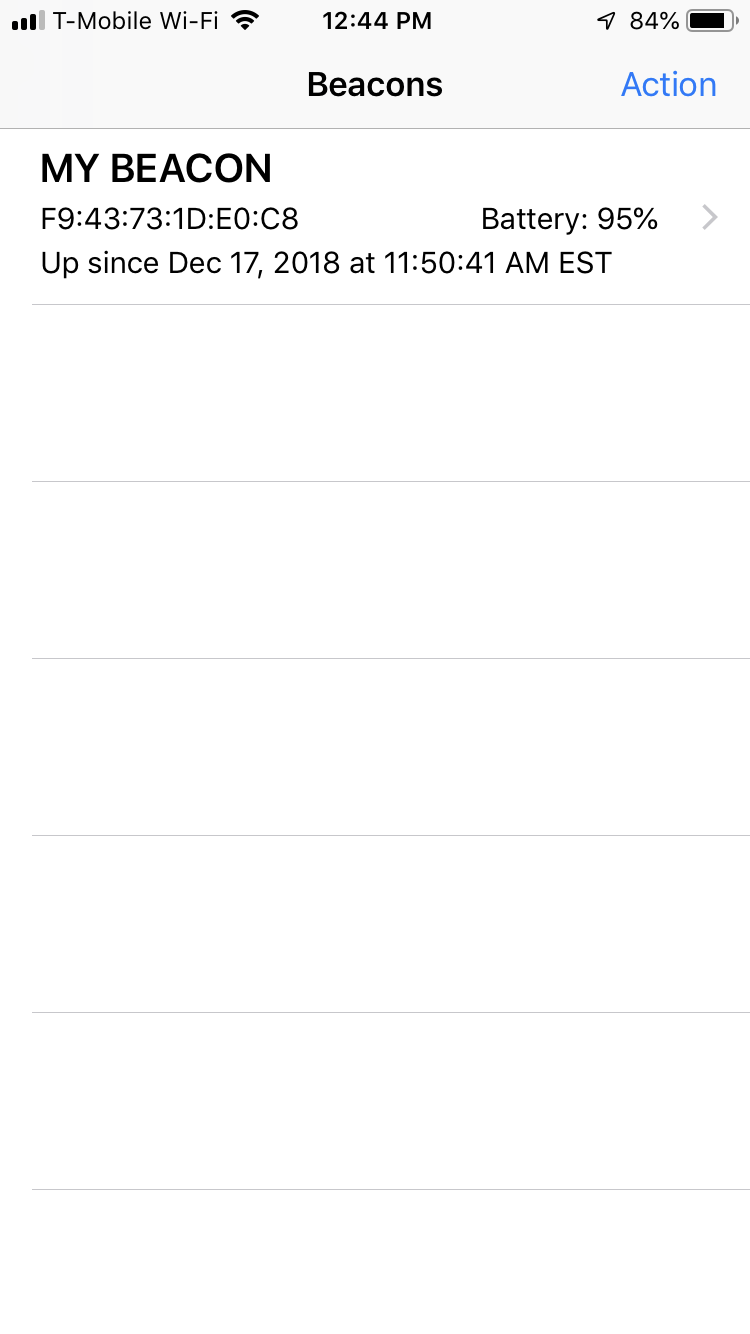
Beacon Information
The beacon information section displays status information about the connected device. The “Version” field indicates the firmware version of the beacon. The “MAC address” fields corresponds to the address of the beacon. The “Battery” field shows the current percentage of remaining battery in the device.
Slot Configuration
To start configuring the slots, tap the “Enable” toggle switch to the ON position. Once the slot has been enabled, the list of slot configuration options will expand as shown in the figure below.
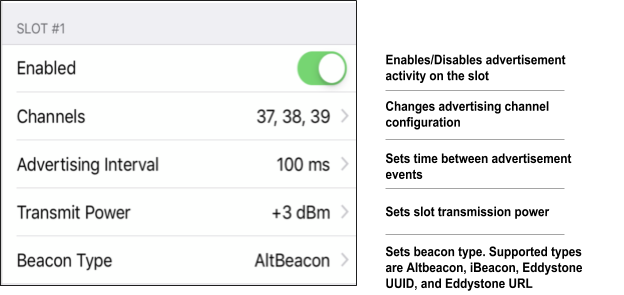
Enabled
The “Enabled” switch is used for starting/stopping advertisement activity on the slot.
Channels
The “Channels” option is used for switching advertisement on/off on the 3 individual Bluetooth™ Low Energy advertising channels.
Advertising Interval
The “Advertising interval” value is used for configuring the frequency rate at which the slot advertises data.
The recommended interval value for iBeacon advertisement is 100ms. Increasing the “Advertising Interval” value increases the lifespan of the RadBeacon E4’s battery.
Transmit Power
The “Transmit Power” value determines the strength of the wireless signal transmitted by the RadBeacon E4. The transmit power is proportional to the area coverage of the wireless signal. Increasing the transmit power reduces the lifespan of the RadBeacon E4’s battery. For properly calibrated devices, set the transmit power to +4 dBm for a 30 meters estimated radius of coverage. Refer to the calibration section for more information about how to calibrate the RadBeacon E4.
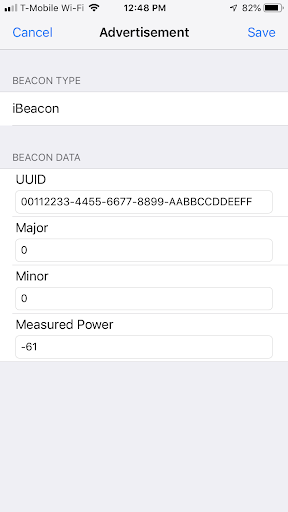
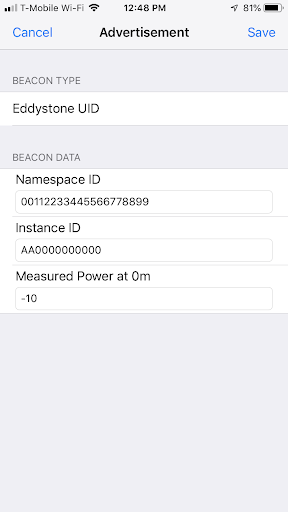
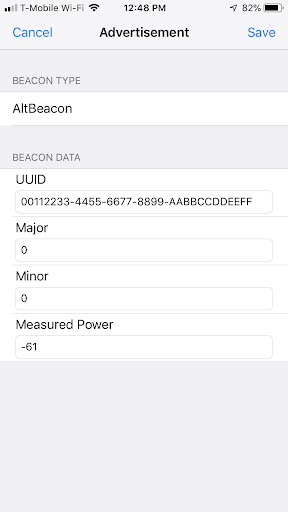
Beacon Type
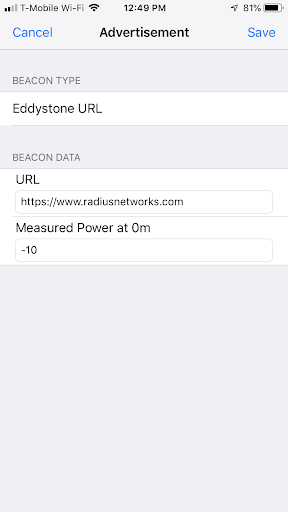
The “Beacon Type” screen allows users to configure the advertisement protocol and advertisement data. The RadBeacon E4 supports 4 of the most popular beacon protocols available; Altbeacon, iBeacon, Eddystone UUID, and Eddystone URL. Each slot can be configured to advertise data using one of the 4 beacon protocols. The data advertised varies based on the chosen protocol. See screens below for beacon data configuration examples.
The beacon data could include fields for UUID, Major, Minor, Namespace ID, Instance ID, URL, Measured Power at 0m (0 meters), and Measured Power (at 1 meter).
Data Fields
UUID → Length: 32 characters, Format: 00112233-4455-6677-8899-AABBCCDDEEFF
Major → Range: 0 to 65535
Minor → Range: 0 to 65535
Namespace ID → Length: 20 characters, Format: 00112233445566778899
Instance ID → Length: 12 characters, Format: 001122334455
Measured Power → Range: -1 to -127
The “Measured Power” parameter offers a way to calibrate the beacon’s RSSI at a distance of 1 meter or 0 meters depending on the beacon protocol specification.
Selected Key
The “Selected Key” option can be used to choose an authentication key for applying configuration changes. Tap on the box under the “Selected Key” label to expand the list of available keys. See more about key generation and usage in the Key Management section.
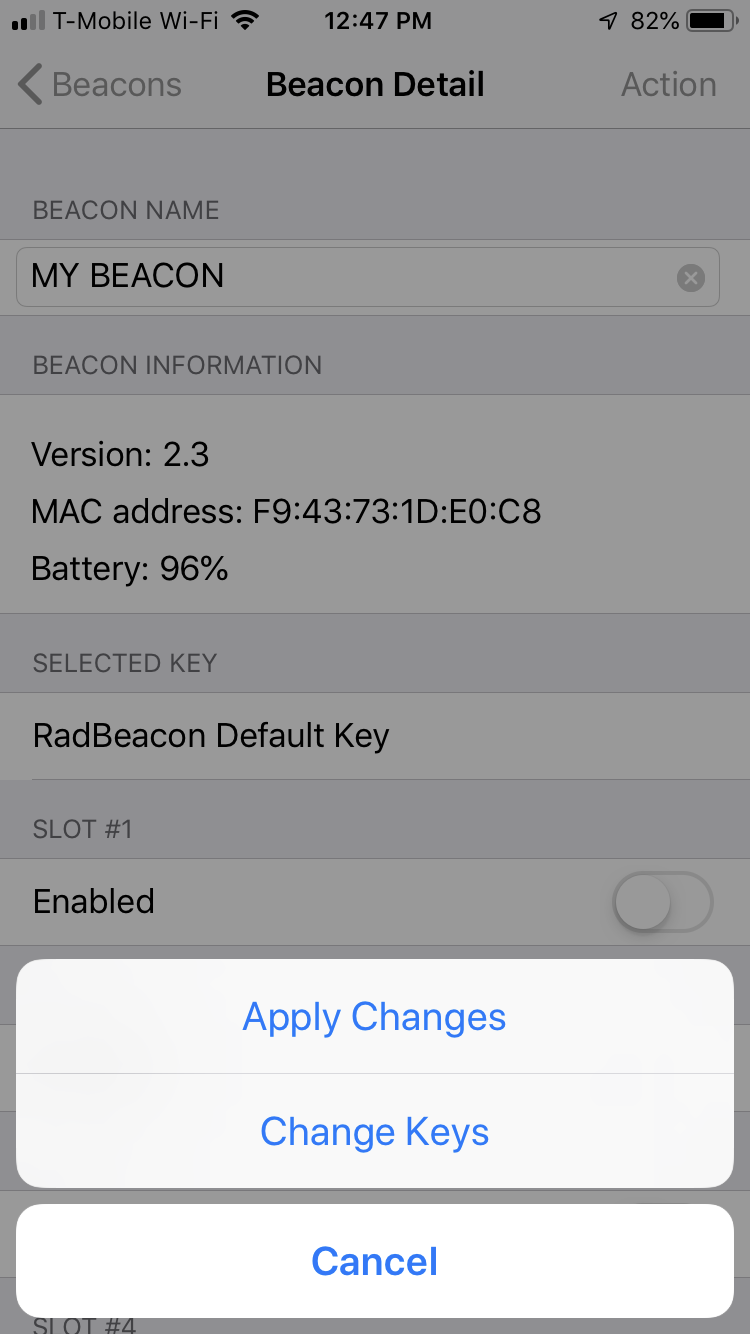
Action
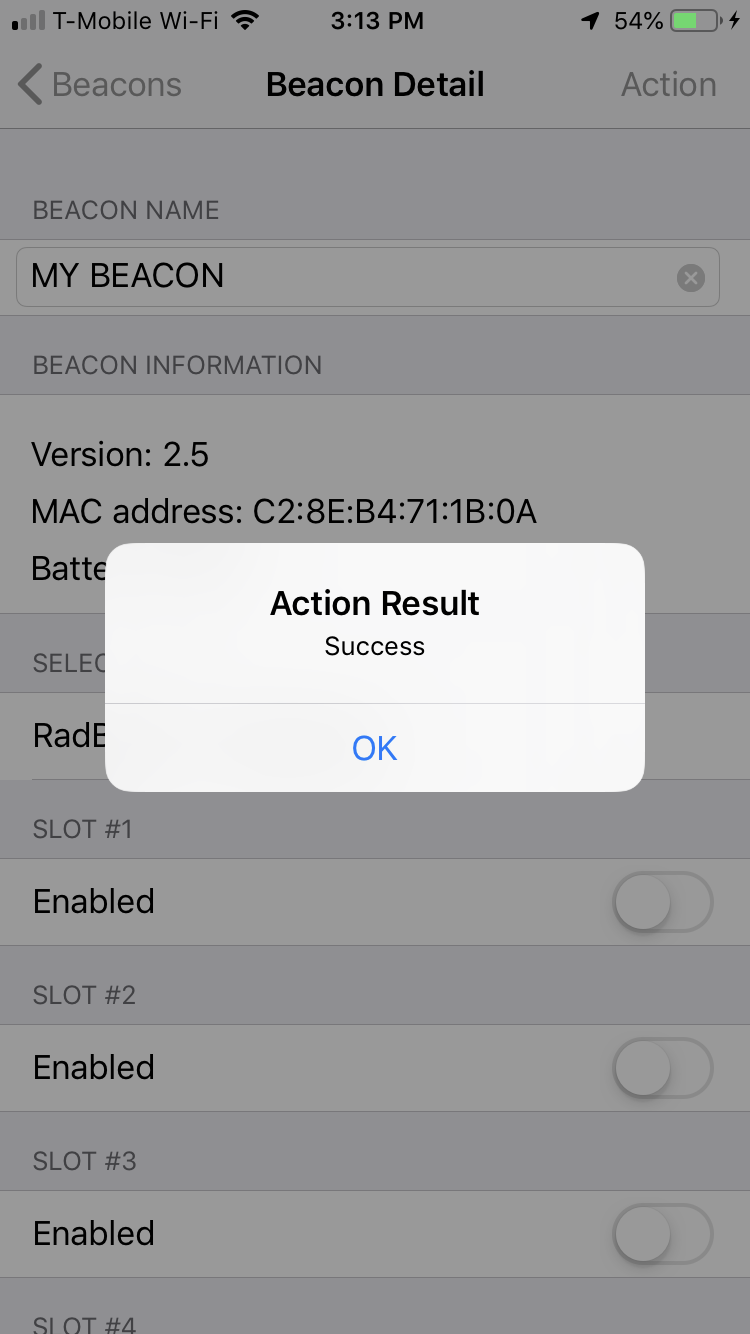
Apply Changes
After setting the beacon parameters, we must configure the device with the new values. To start the configuration process, tap on the “Action” menu, then select “Apply Changes”.

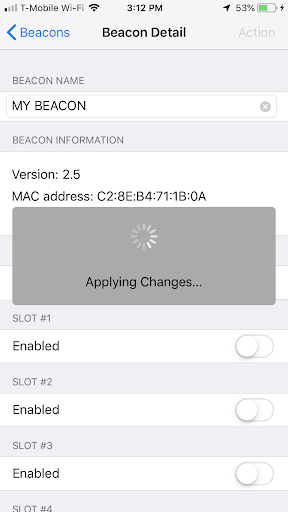
After done applying changes, a message box indicating the action result will appear. Some examples of action result screens below.
Tip: If the apply-changes results in authentication failure, verify a valid key is set.

Change Keys
Prior to configuring the RadBeacon E4 with a new authentication key, make sure the “Selected Key” option is set to the correct key. To configure the beacon with a new authentication key, tap on the “Action” menu, then select “Change keys”.
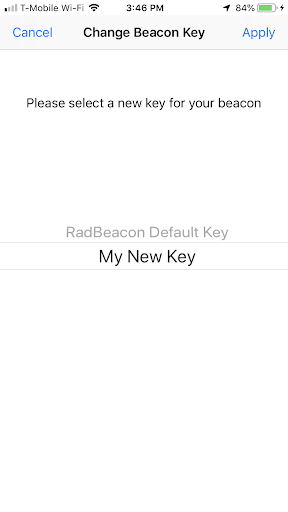
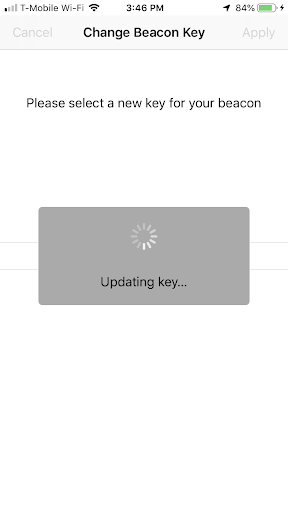
Scroll through the list of available keys and select the new key to configure the RadBeacon E4 with. Then, tap on “Apply”. A message box showing that the new key-update is in progress will appear. The action result will show “Success” after the device RadBeacon E4 has been configured with the new key.
Tip: Make a note to link the RadBeacon E4 device with its configured key name.
Troubleshooting: If the action results in failure, verify that the correct key was selected before tapping on “Apply”.

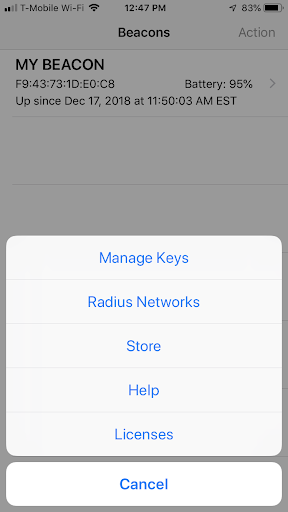
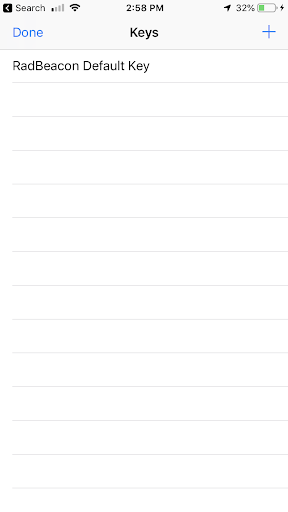
Key Management
The RadBeacon E4 uses key-authentication to prevent unauthorized from changing the device’s configuration. The RadBeacon E4 device and RadBeacon E App ship preconfigured with a default key. From the home screen of the RadBeacon E App, tap on “Action” to show the list of available actions. Tap on “Manage Keys” to enter the key management screen. The key management screen shows the list of available keys in the App. See screen on the far right below.
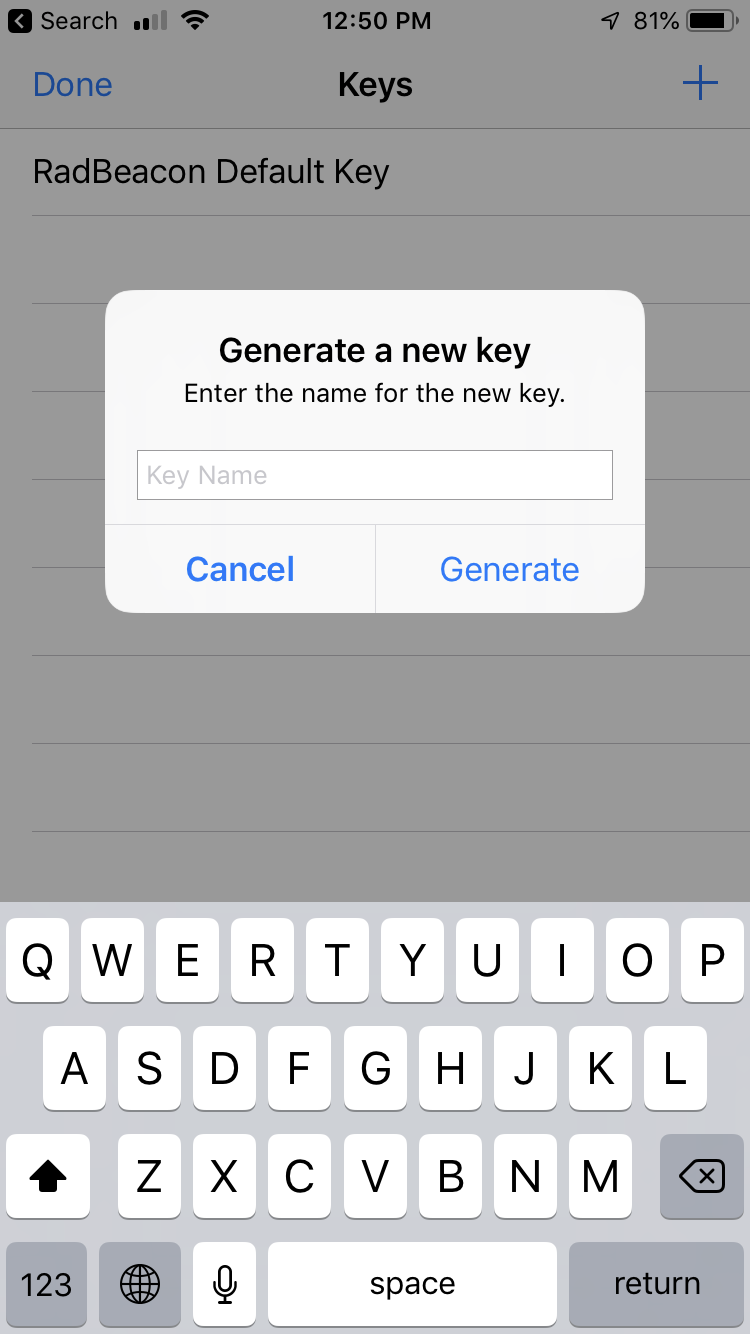
Key Generation
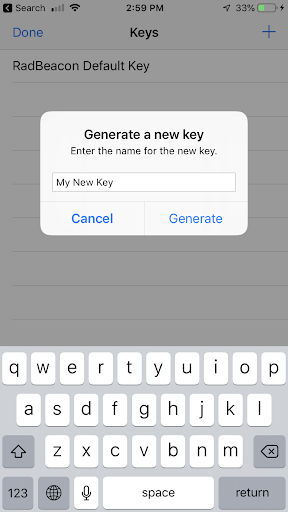
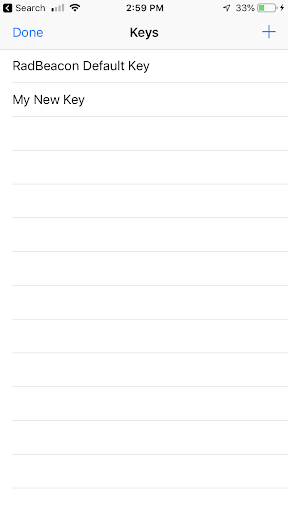
To generate a new key, tap on “+”, enter the name of the new key when prompted, and tap on “Generate”. The new key will appear in the list of available keys.
Exporting Keys
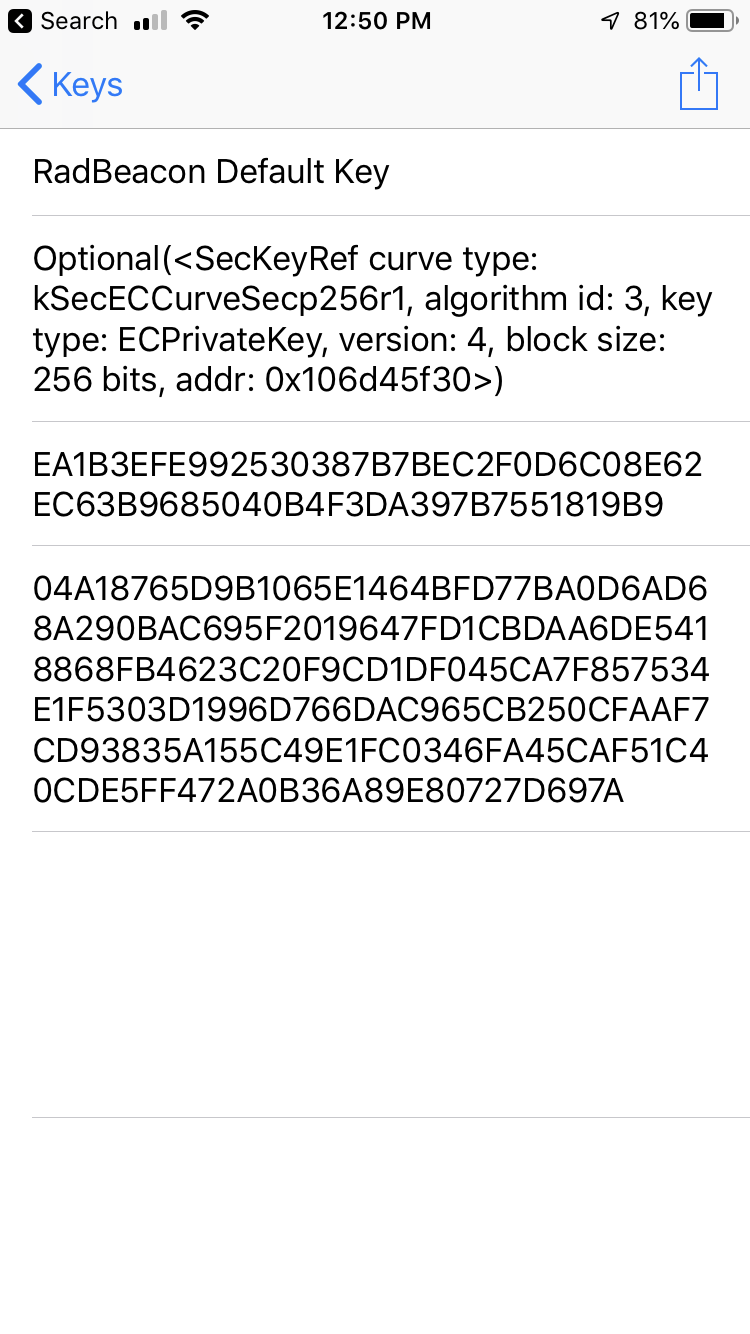
To begin the key exporting process, navigate to the key management screen. Once there, tap on the key to export. Tap on the “share” icon and choose the best location to save your key.
Importing Keys
Keys can be imported by click on a .r12 key file from outside the RadBeacon E App. To import a key, Tap on the .r12 file and select “Copy to RadBeacon E” from the list of apps. Next, the RadBeacon E App will launch and the “Import key” screen will appear. Enter a key name and tap on the “Import Key” button. The key should appear on the list of available keys.
Key Removal
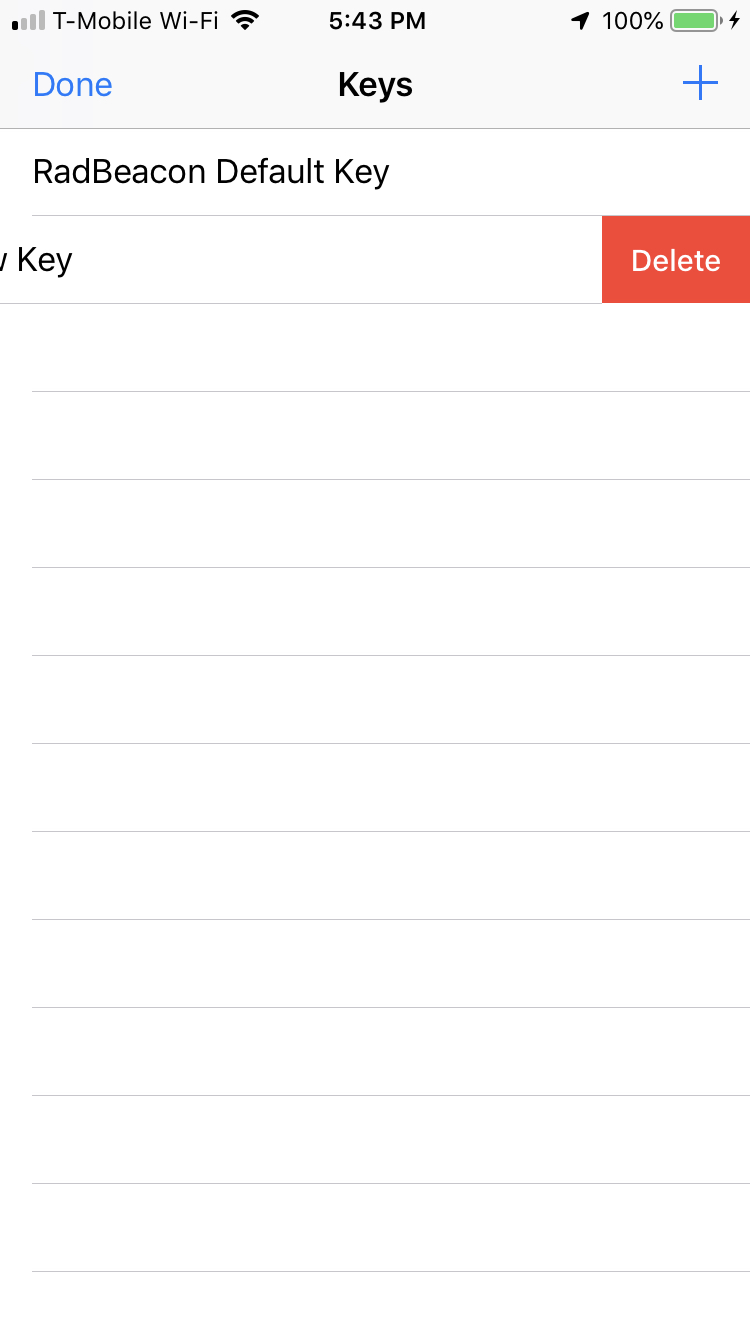
To begin the key exporting removal process, navigate to the key management screen. On the key management screen, swipe left on the key you wish to remove from the App.
Note: The RadBeacon E App does not allow users to remove the default key (“RadBeacon Default Key”).
Battery Replacement
Peel back the adhesive strip from the bottom of the beacon, exposing four Phillips head screws. Use a Phillips #0 screwdriver to open the case, noting gasket placement. Remove and replace 4x AA batteries. Close case using screwdriver, taking care that gasket is fully seated to the top and bottom of the case.
Beacon Calibration
Before proceeding with the calibration steps, make sure the latest version of the Locate Beacon App is installed on your mobile device. For best results, the mobile device should be in portrait orientation and the top half of the device should be not be covered by your hand, a case, or anything else that would obstruct line-of-sight to the beacon while calibrating.
- Launch the Locate Beacon App and select the device targeted for calibration procedure from the device list
- Holding the mobile device as previously instructed, stand 1 meter away from the beacon being calibrated
- Press "Calibrate" or "Begin Calibration" to start collecting RSSI measurements. Gathering sufficient RSSI values should take approximately 1 minute to complete.
- Once the procedure completes, make note of the resulting "Measured Power" value
- Launch the RadBeacon App and configure the beacon's "Measured Power" with the value obtained in step 4. Refer to the slot configuration section of this document for detailed instructions about "Measured Power" configuration